
guest room & studio, part 05: painting the room
03.08 - 04.08 yes, that really is a different wall color. no, really.
 click to see the full photo gallery[NOTE: this project was done in conjunction with the library project.]
At last! We were ready to paint. Painting is my favorite part. Sure, it's a lot of work (although I would contend that it's really the preparation that's the bulk of the work; the actual painting part goes by in a flash), but nothing transforms a room quite as quickly or completely as a fresh coat of paint.
In this case, the existing room color was a pale yellow with a hint of very pale green. It was actually an okay color. Unfortunately, the POs were smokers so the color was dingy even though we did wash the walls when we first moved in. The other unfortunate thing about a house that's been smoked in is that the drywall/plaster absorbs it to some degree, and there's a kind of oily grime that seeps out even years after the smokers are gone and walls have been washed. I'm sure it stops at some point, but a wipedown of the walls revealed the grime.
Because of the aforementioned smokers, we always use primer when we paint in this house to prevent that seepage. You should really use primer anyway, but it's pretty much a necessity if you had smokers in your house previously if you want to stop the problem.
But first we had to actually go get the paint. Lots and lots of paint. We buy our paint from Miller Paint because it's quality, it's local, and they have a line of low-VOC we like. (Although we've bought from Sherwin-Williams and they're great, too.) They'd just opened up a new location on Interstate that we were looking forward to trying out instead of heading to SE, so that turned out to be awesome. When we got there I whipped out my spreadsheet of different rooms, measurements, and colors, which I just love doing because the paint people go apeshit for that. I guess they see a lot of people with illegible scribbles on toilet paper or something, the way they practically get down on their knees and thank you for having an organized list.
For the trim, windows, ceilings, and doors in both rooms, hallway, and closet, we ended up with Coconut White, which is the same creamy color we used for the trim and windows in the attic. For the hallway, we chose the same dark yellow/gold color as we used on the living room accent wall, which was a Sherwin-Williams color called Bakelite Gold, but they had a perfect match for called Impulse. For the guest room, I matched my pale yellow and blue quilt my mom made, resulting in a lovely pale yellow for the wall color called Hawaiian Cream. (Hawaiian Cream and Coconut Milk...think the Universe is trying to tell me something?) And then for the media room, a glorious dark blue color that we had custom mixed, because Lord of the Rings permeates our life. Oh, and then primer for all the rooms.
So here was the final tally:
- 4 gallons "Coconut Milk", semi-gloss -- trim, doors, windows (total area to cover: 674 sq.ft. -- we have a shitload of trim & 7 doors)
- 2 gallons "Coconut Milk", flat -- ceilings (total area to cover: 342 sq.ft.)
- 2 gallons "Impulse", satin -- hallway (total area to cover: 227 sq.ft.)
- 2 gallons custom blue, satin -- media room (total area to cover:473 sq.ft.)
- 2 gallons "Hawaiian Cream", satin -- guest room & closet (total area to cover: 687 sq.ft)
- 2 gallons Acro primer, gray -- guest room to help with the coverage for that dark blue
- 3 gallons Acro primer, white -- everything else, including trim, ceilings, doors, and windows
That's 17 gallons of paint and primer for those of you playing along at home, and since our car barely cleared the turn onto the street because of all the weight, it was confirmation that it was a shitload of paint.
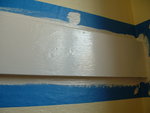
The nice thing about the primer part -- even though it' yet another preparatory stage -- is we could use the same primer for both trim and walls so there was no need to mask or cut in. So the priming stage went pretty quickly even though there was a lot of surface to cover. And despite having to do two coats, since both the walls and the trim and especially the ceiling absorbed the primer far more than expected.
 click to see the full photo galleryThe wall color doesn't seem a whole lot different than the previous color, especially in the pictures, but once we started putting it on, it was noticeably different. Warmer, creamier, brighter. That room gets a lovely late afternoon/evening light, only getting direct sun in the summer because it faces north, so the new color positively glowed in that rich light. I'm drawn more toward jewel tones than pastels as a rule, but I love any shade of yellow and the soft buttery creaminess of this particular yellow is probably my favorite (hence the quilt my mom made for me many years ago).
Once we had two coats applied and the paint had a chance to set, we meticulously masked all the trim. All the trim. Have I mentioned there's a shitload of trim? And then we were ready to paint it all with that rich trim color -- talk about creamy! -- and combined with that yellow, the room turned out even better than I'd hoped it would.